
Color
The Color tools restore the colors your camera didn't quite capture. Camera sensors record light in a straight line, so photos often look washed out compared with what you saw. You'll find the Color panel on the Adjustments page of the right panel, just below Presence. Press K to open it.
Tone changes affect color, so set Tone first.
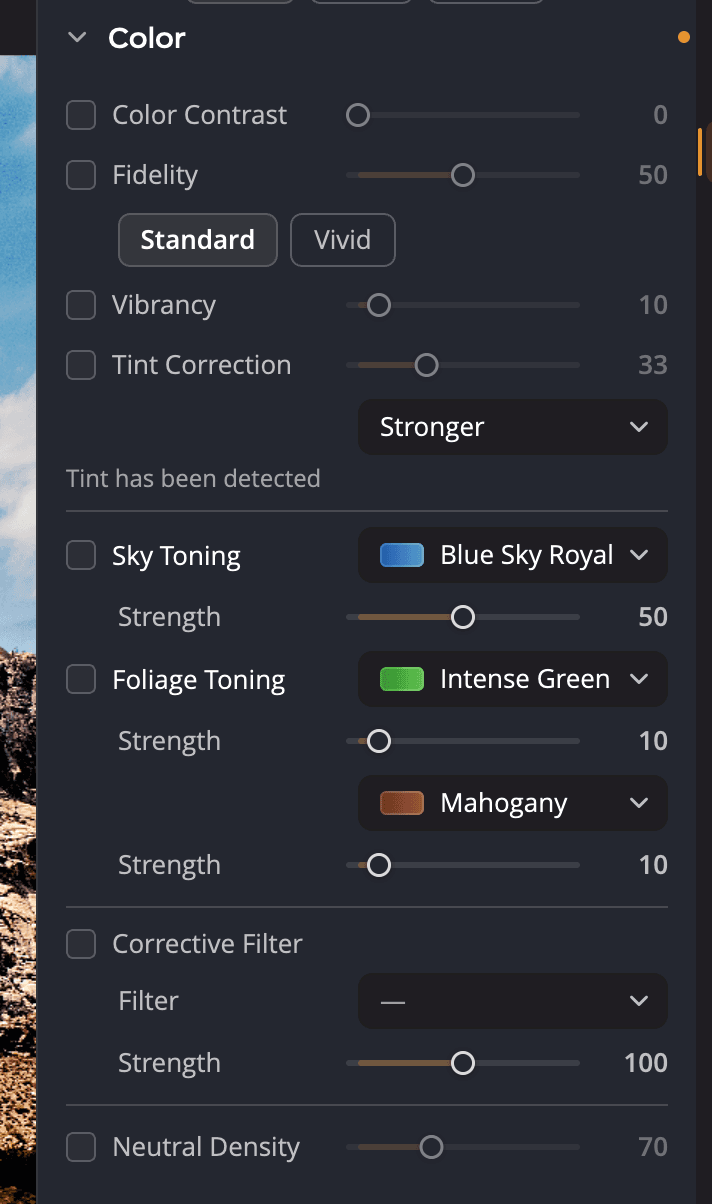
| # | Control | Range (default) | What it does |
|---|---|---|---|
| 1 | Color Contrast | 0 to 200 (0) | Restores faded colors, one color channel at a time |
| 2 | Fidelity | 0 to 100 (15) | Maps colors the camera shifted back to true colors |
| 3 | Vibrancy | 0 to 100 (10) | Adds saturation to dull colors and leaves vivid ones alone |
| 4 | Tint Correction | 0 to 100 (25) | Removes an unwanted color cast |
| 5 | Sky Toning | 0 to 100 (0) | Deepens the color of skies |
| 6 | Foliage Toning | 0 to 100 (10) each | Refines greens, golds and browns |
| 7 | Corrective Filter | 0 to 200 (50) | Adds the effect of a glass filter in front of the lens |
| 8 | Neutral Density | 0 to 200 (70) | Tones down oversaturated areas |
Each tool has a checkbox. Moving a tool's slider selects its checkbox for you. Double-click any slider to return it to its default.
Restore faded color
Color Contrast checks whether the camera captured the full vibrancy of each color. It looks at each color channel on its own, not only at the blacks. If colors faded, it restores them and keeps them true. If the camera got the colors right, it has no effect.
Fidelity fixes the rich purples and blues that sensors often fade or shift. It maps them back to the colors the eye saw. Choose a style:
| Choice | What it does |
|---|---|
| Standard | Restores the full range of colors the camera missed |
| Vivid | The same, with more contrast and more vivid colors |
Vibrancy is a traditional vibrance control. It adds saturation to colors that are low in saturation, and it doesn't oversaturate colors that are already strong. It usually works best at low values.
Remove a color cast
Tint Correction removes a cast that the light added: green from fluorescent tubes, blue from shade or yellow from tungsten bulbs. Turn it on and off to decide whether you like the result.
Under the slider, a menu sets how hard it works: Minimum, Default, Stronger or Maximum. Once Radiant Photo has analyzed the photo, a line below reads Tint has been detected or No tint detected.
Tip
For color spill on people, for example from a colored backdrop, try Color Cast Removal in the Skin Tone panel.
Enhance skies and foliage
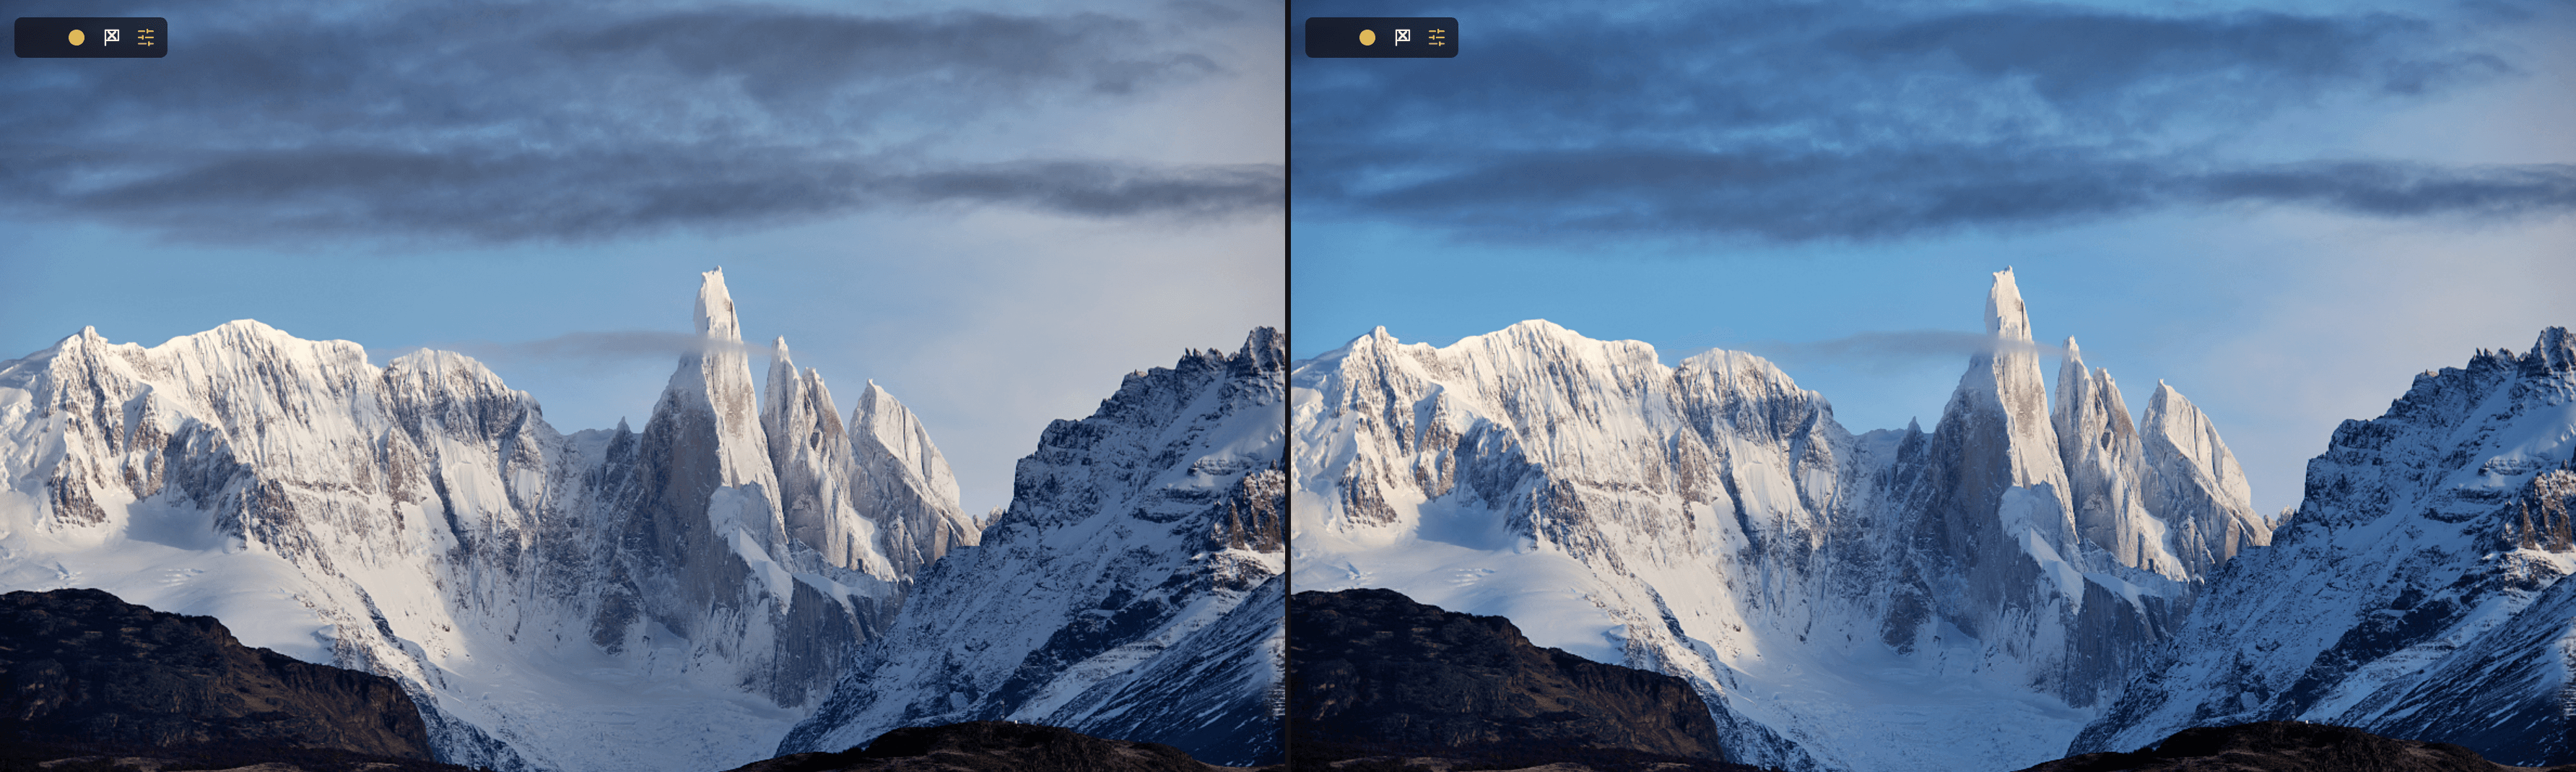
Sky Toning brings out the color in a sky. It also works on many other photos to enhance natural light. Pick a recipe from the menu, then raise Strength:
- Blue Sky Royal (the first choice)
- Blue Sky Cerulean
- Blue Sky Aquamarine
- Night Enhance
- Night Sky
- Sunset
Foliage Toning refines the greens, golds and browns of nature. It has two recipes, each with its own Strength:
| Greens | Browns |
|---|---|
| Intense Green (first choice) | Mahogany (first choice) |
| Goldenrod | Burnt Sienna |
| Evergreen | Sepia |
| Tropical Forest | Clay |
| Forest Green | Autumn |
Note
Foliage Toning is not masked. It changes every area with matching colors, not only the trees. Sky Toning works the same way until you turn on its mask (see Tone only the sky). Low values look most natural. For a masked version of both, use the Sky & Foliage section of the Graduated Filter.
Tone only the sky
Sky Toning can work through a mask, so it colors the sky and leaves the rest of the photo alone. Radiant Photo finds the sky when you ask it to, and you can paint to fix any edge it misses.
- Select the Sky Toning checkbox, pick a recipe and set Strength.
- Click Use mask, the square button with a dashed outline after the recipe menu. It lights up, and the Mask section opens under Strength.
- Click Add and choose Sky. The line under the buttons reads Finding the sky… Then a Sky part appears in the list, and Sky Toning changes only the sky.
The mask is soft. It is strongest where the photo is clearly sky and fades at the edges. The Sky row, and the head of the Mask section, show how much of the photo the sky covers. If the photo has no sky, no part is added and the line reads No sky found in this photo.
Until the mask has a part, Sky Toning still changes the whole photo. Click Use mask again to turn it off. Sky Toning then changes the whole photo again, and the mask is kept for later. Each change to the mask is one undo step.
Build the mask
The mask is made of parts, listed in the Mask section. They combine from the top of the list down.
- Add, Subtract and Intersect each open a menu with two tools, Sky and Brush. The new part combines the way its button says. Add puts it in the mask, Subtract takes it out, and Intersect keeps only where it overlaps the mask so far.
- A mask holds one Sky part. To find the sky again, remove it first.
- Start with Add. A first part that subtracts or intersects has nothing to work on, so the mask covers nothing.
- Click a row to show its settings under the buttons. Hold the eye on a row to hide that part while you hold it. Click ⋯, or right-click the row, for Remove and, on most parts, a choice of how it combines.
Paint with the brush
Use a brush to add what the Sky part missed, or to clean up where it spilled onto a building or a tree.
- Click Add and choose Brush. The new brush is ready to paint at once.
- Choose Paint to add to the mask, or Erase to take away from it.
- Drag on the photo. Each stroke is one undo step.
- Click Stop painting, or press Esc, when you're done. To paint again, click the brush's row or Paint on the photo.
A brush you add with Add paints on the mask that the parts above it made, so Erase can clean any edge of the sky. A brush you add with Subtract or Intersect is a part of its own and combines that way. Clear strokes removes all of a brush's strokes.
| Setting | What it does |
|---|---|
| Size | How big the brush is, from 1 to 100. [ and ] make it smaller and larger. |
| Softness | How soft its edge is, from 0 to 100%. A new brush starts at 50%. |
| Flow | How much each stroke lays down, from 0 to 100%. A new brush starts at 100%. |
Keep the clouds out
Once the mask has a Sky part, Clouds appears under the parts. It sets how much of the mask the clouds in the sky keep, from 0 to 100%. At 100%, the default, it changes nothing. Lower it to keep Sky Toning off the clouds, so they stay white while the blue deepens. At 0%, the mask leaves the clouds out.
Some skies have too little clear blue, or too few clouds, for Clouds to make a difference. Then a line takes its place: Clouds isn't shown: this sky has too little clear blue, or too few clouds, for Clouds to change anything.
See the mask
- Tick Overlay to show the mask on the photo. It's available once the mask has a part. Click the swatch beside it to choose Red, the mask in red over the photo, or Gray, the mask alone in black and white.
- While the Mask section is open, O or
\shows or hides the overlay, and ⇧O (Shift+O on Windows) switches between Red and Gray. While you crop or remove spots, those keys keep their own jobs. - Hold ⌥ (Alt on Windows) and click the head of the Mask section to see the mask in Gray while you hold the button.
- The mask also shows while you drag Clouds or a Refine slider, and while you paint.
Refine the mask
Under the overlay, Refine works on the whole mask. It's folded, and its head reads Defaults until you change something in it.
| Setting | Range (default) | What it does |
|---|---|---|
| Black point | 0 to 255 (0) | Raise it to drop the faintest parts of the mask. |
| Midpoint | 0.10 to 9.99 (1.00) | Above 1, the soft parts of the mask get stronger. Below 1, they get weaker. |
| White point | 0 to 255 (255) | Lower it to make partly covered areas fully covered. |
| Feather | 0 to 25% (0) | Softens the mask's edges, measured against the photo's long side. |
| Shift Edge | −100 to +100% (0) | Above 0, the mask grows past its edge. Below 0, it shrinks. |
The mask stays with the photo
Radiant Photo keeps the mask with the photo's settings, so it's there when you open the photo again, and your saved files use it. The Graduated Filter's Sky shape uses the same mask. See Graduated Filter.
When you copy Sky Toning to other photos, with Paste or Sync, Use mask, Clouds and Refine go along, but the mask itself never does. Each photo needs its own. On the other photo, click Add and choose Sky to find its sky. Until then, its Sky Toning changes the whole photo.
Use a corrective filter
Corrective Filter works like a traditional glass filter in front of the lens.
- Select the Corrective Filter checkbox.
- Choose a filter from the Filter menu. The filters come in two groups: Color and Corrective.
- Set Strength.
Low values balance color and light. High values stylize the photo. The Corrective group includes warming filters for a bluish cast, cooling filters for a red or orange cast, and an underwater filter for diving and snorkeling photos.
Neutral Density tones down oversaturated areas. Some built-in recipes turn it on for you.
Start over
Point at the panel header and click the reset button (Reset Color). It turns off every Color tool and returns its sliders to their defaults.